How to Install Charging Station for YUKA
Choosing a Location
Ensure the charging station is installed in an open area, free of bumps, or obstacles.
- Place the charging station on a flat ground.
- The charging area (1x1 m/3x3 feet in front of the charging station) should be free from significant bumps. The slope must be less than 5゚.
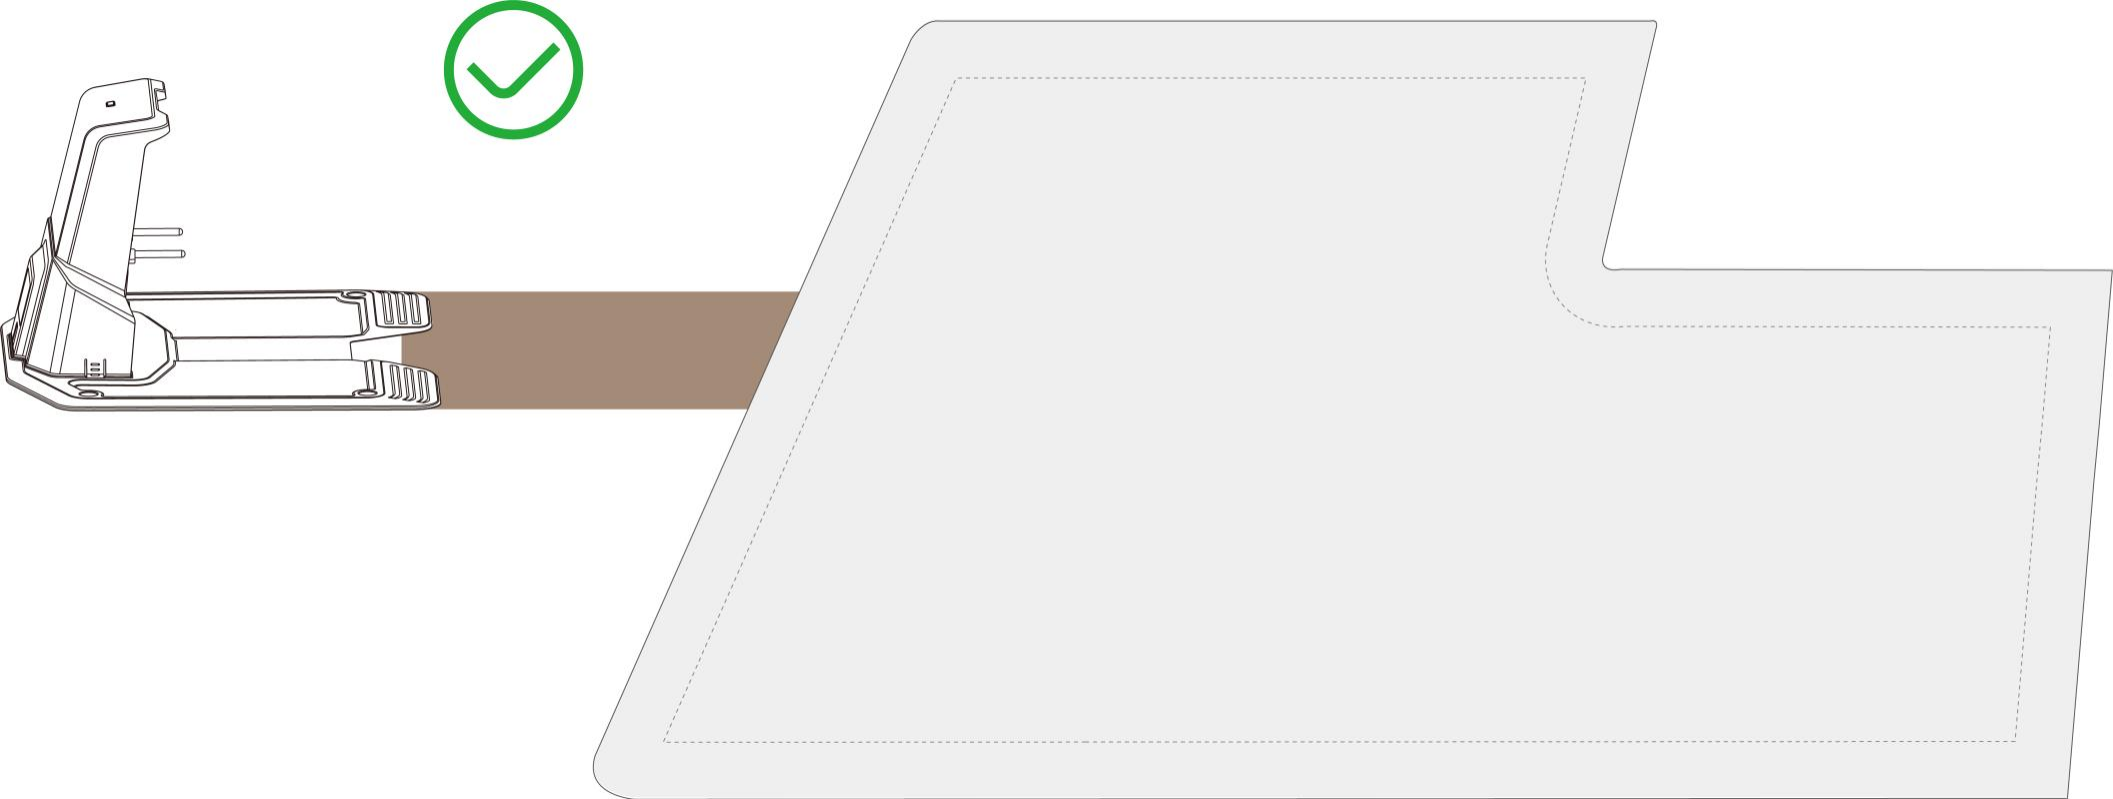
- DO NOT install the charging station at the corner of an L-shaped building or on a narrow path between two structures.
- No obstacles or other items should be between the charging station and the docking point.
- The base plate of the charging station must remain flat and not be bent or tilted.

If the charging station is placed outside the lawn, create a channel to connect it to the lawn.
NOTE
If the charging station is installed on a concrete surface, please secure it with expansion bolts.
Install the Charging Station
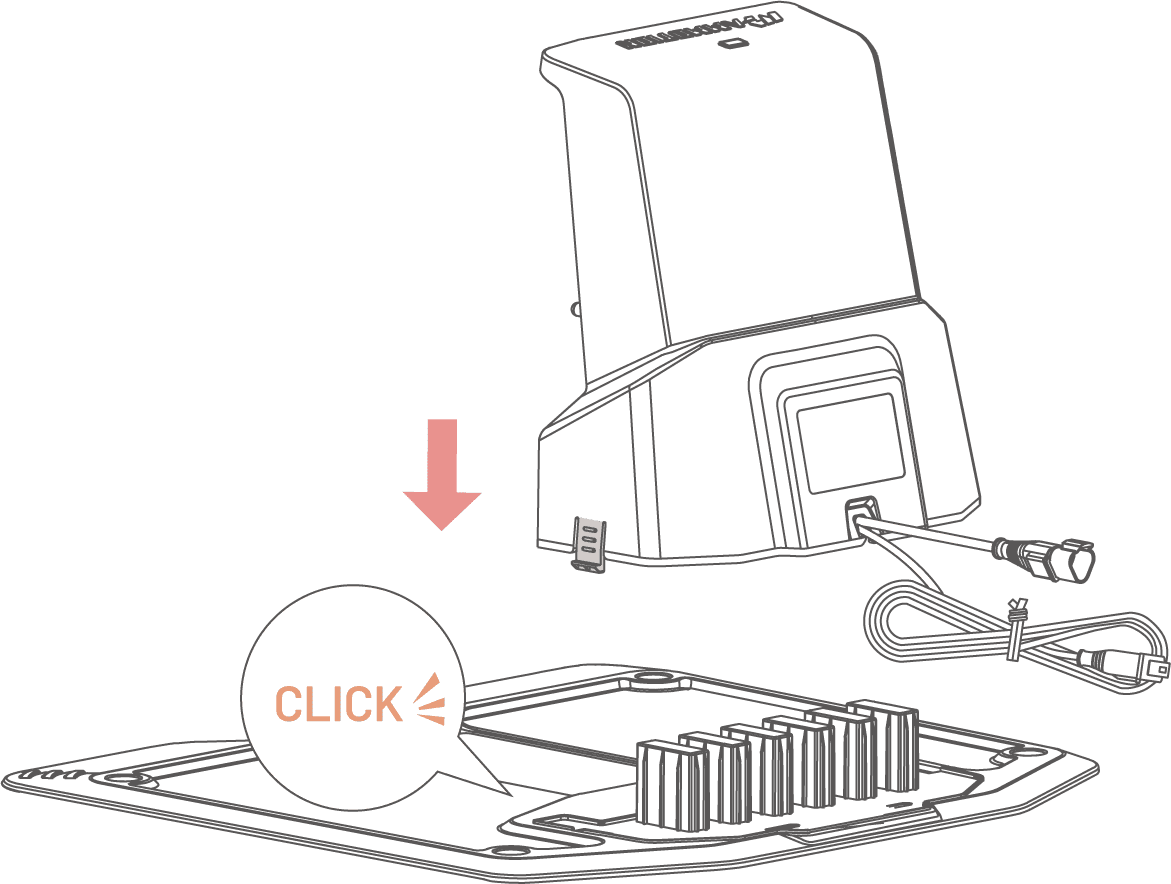
1. Insert the charging tower into the charging base plate until you hear a CLICK sound.
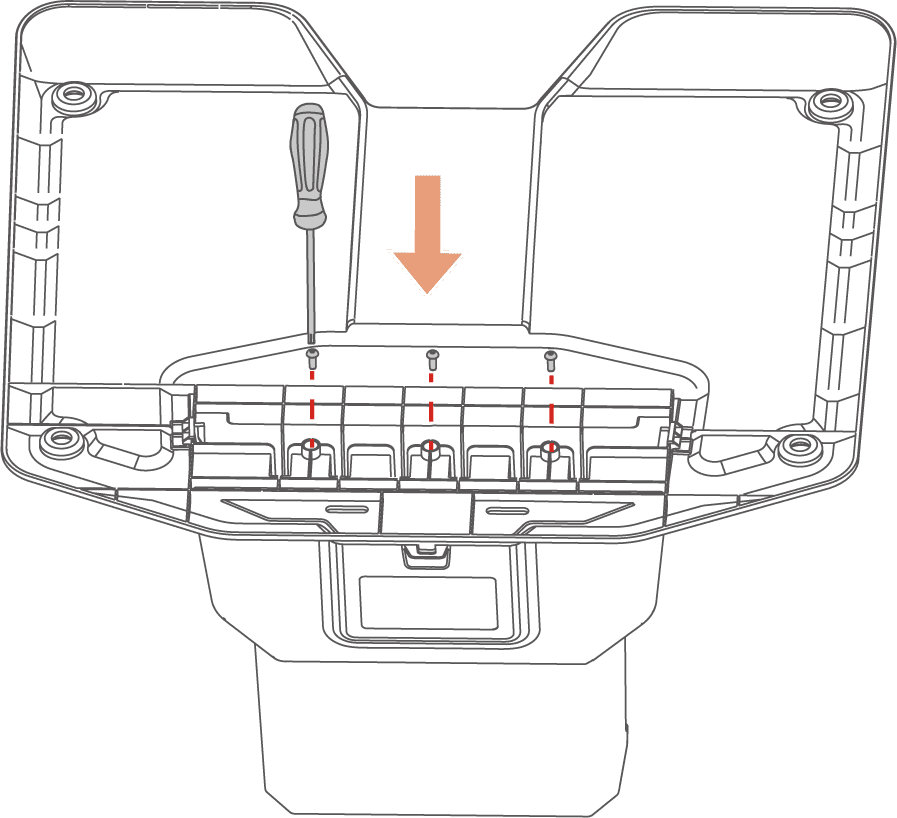
2. Install and tighten the three screws from the bottom of the charging base plate using the screwdriver with the 2.5mm (0.1 in) hex bit
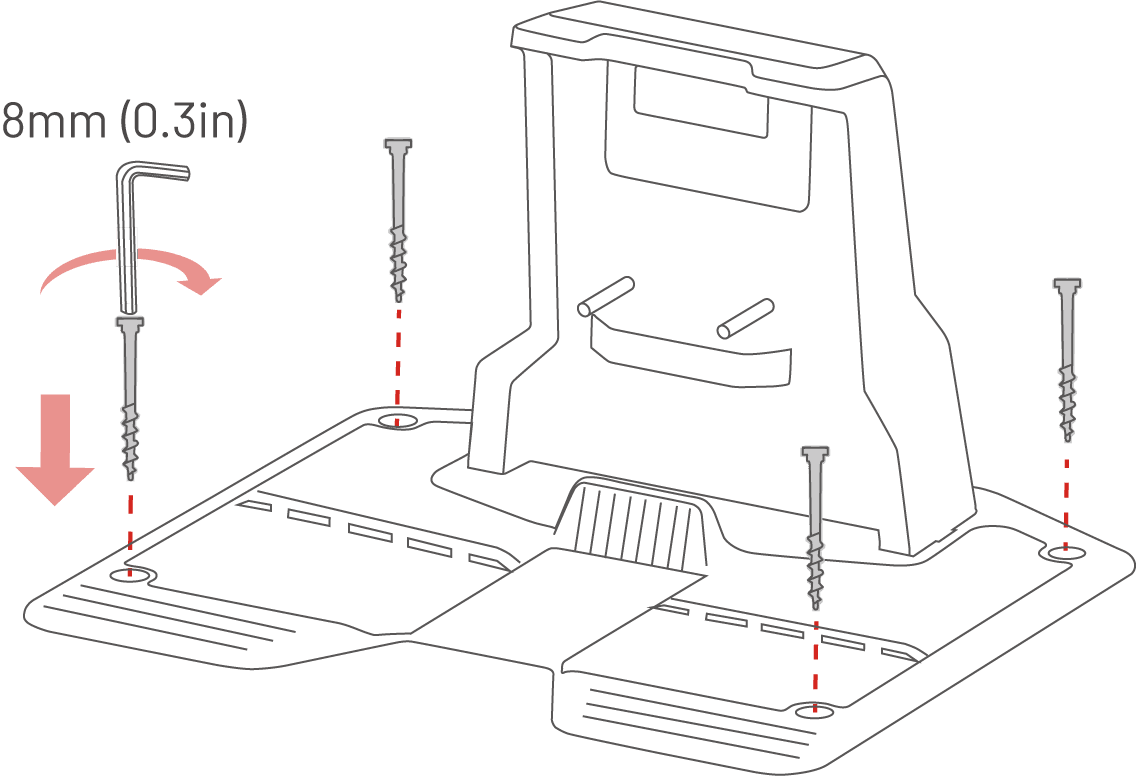
3. Select an open spot to install the charging station, ensuring its front area is clear of obstacles. Secure the charging station in place using the four stakes and the 8 mm (0.3 in) Allen key
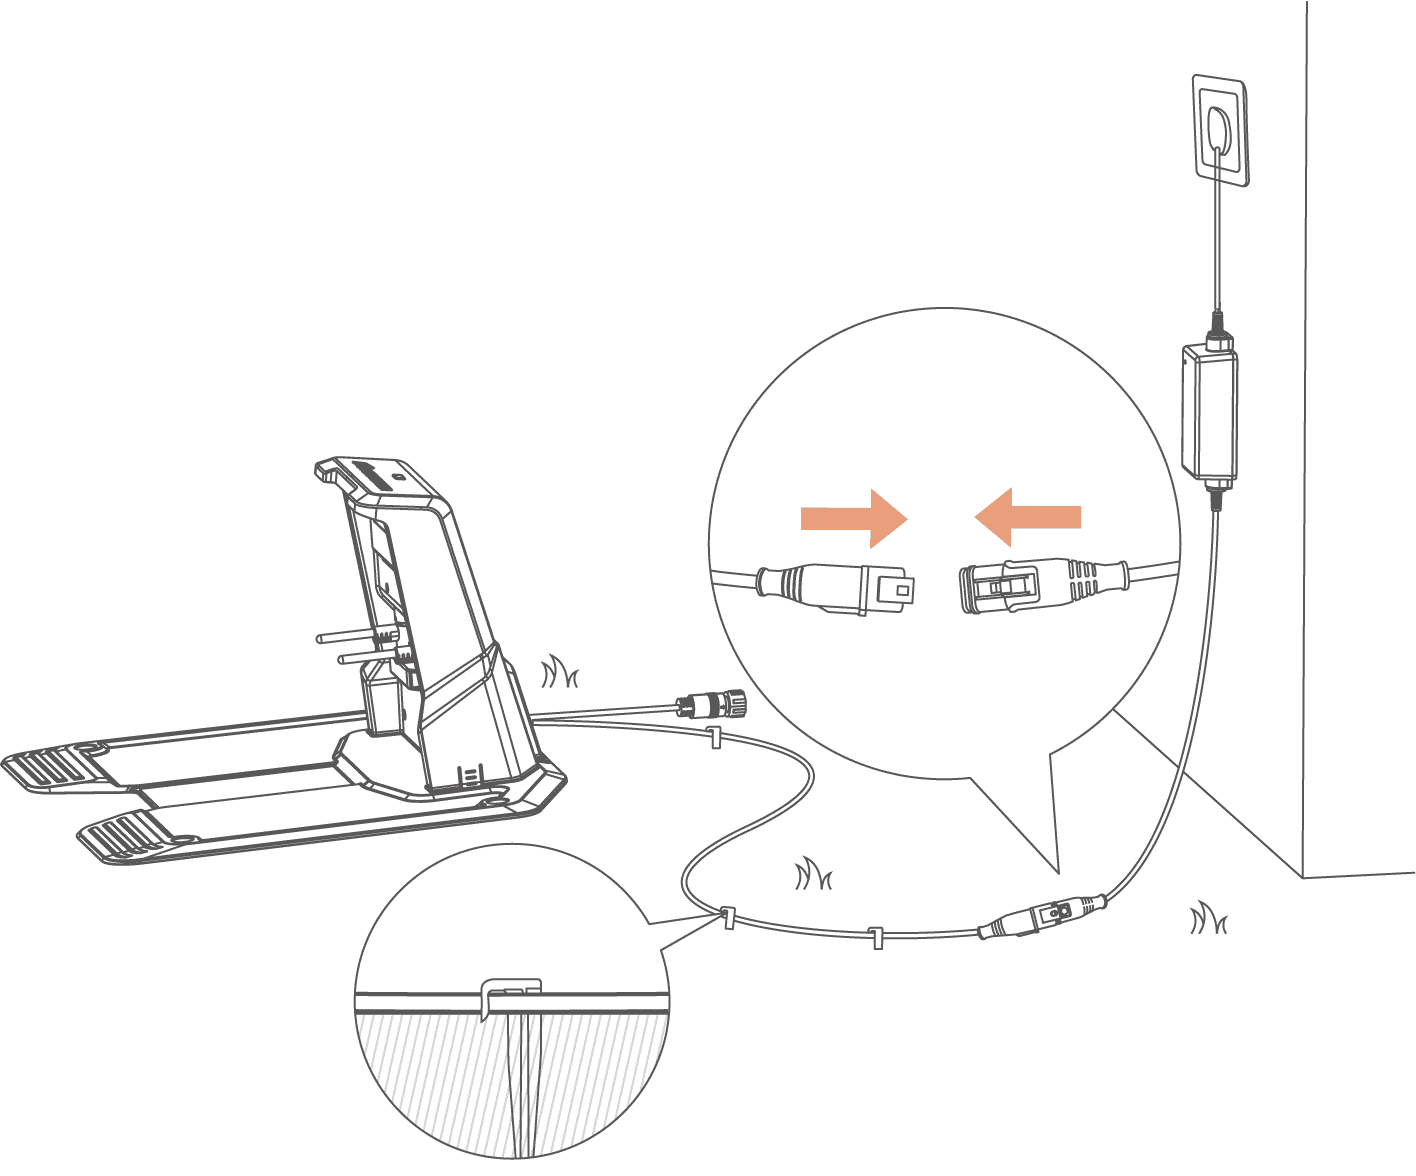
4. Connect the charging station cable (the longer one) with the power supply.
5. Use the cable peg to fix the cable on the ground.
6. Plug the charging station power supply into the wall socket.
NOTE
Charge the robot for initial use to
activate it.
Related Articles
How to Install Charging Station and Adapter for LUBA 2 AWD and YUKA?
YUKA Series 2024 User Manal - EN
YUKA Series 2024 User Manal - ENHow to Install RTK Reference Station
Choose a Location To optimize the performance of the RTK system, the RTK reference station must be in an open area to receive satellite signals. You can install the RTK reference station on flat, open ground or on an unobstructed wall or roof. In ...YUKA Specs
YUKA 1500 YUKA 2000 Max. Mowing Size 1500m²(0.37 Acre) 2000m²(0.5 Acre) Max. Zone Management 10 20 Positioning&Navigation 3D vision &RTK Mowing Area Per Hour 350m²/h Mowing Height For US: 30mm-100mm(1.18in.-3.94 in.)For ...YUKA First Use: SIM Card & Charging Station Setup