How to Set Mowing Task
Preparation
- If any unexpected problems arise, please press the STOP button and secure the robot. The STOP button holds top priority among all commands.
- If the lift sensor is activated, the robot will come to a halt. Please press the Grass button followed by the START button to activate the robot.
- Please mow the task area no more than once a day as doing so may be harmful to your lawn.
- Ensure the robot is at the charging station or within the task area before mowing. If not, manually move or guide the robot to the charging station or task area.

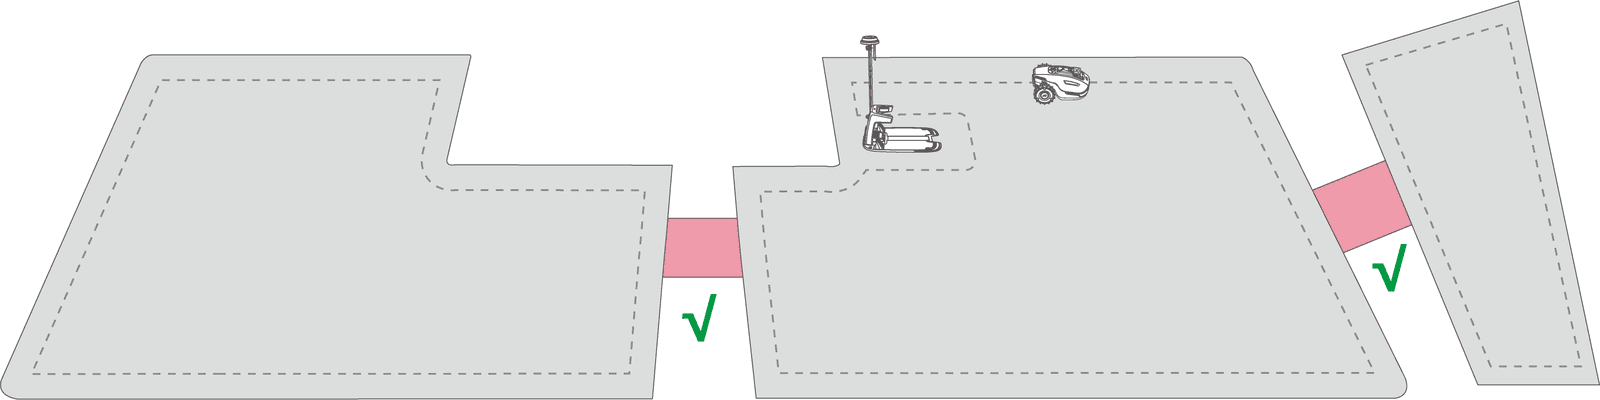
- Ensure a channel is created between task areas or between a task area and the charging station. Without it, the robot will not be able to automatically return for charging when the battery is low.

IMPORTANT
Adjust the cutting height by manually pressing down and turning the Cutting Height Adjustment Knob on the robot before mowing.
Start Mowing
- If you prefer not to set parameters, simply tap
on the Home page to quickly start mowing.
- If you prefer to customize settings before working
1. Tap the robot image to enter the Map page.2. Tap Mowto access the task page.
3. Select the area that you want to mow.4. Tapto configure the parameters.
5. Tap Save to apply the settings.6. Tap Start to commence mowing, or tap Save to create a task schedule.
Task Settings
Frequency
Frequency
You can set the working frequency here.>> Now — The robot will commence work promptly upon configuration.>> Weekly — The robot will repeat the task every week based on your preferences.>> Periodicity — specify non-working days. For example, if you input 3 days, the robot will operate once every 4 days.
Cutting path angle (°)
Cutting path angle (°)
>> OptimalTake the most efficient path recommended by the algorithm as the 0-degree direction.
>> RandomThe working direction will change each time the robot starts a new task.>> CustomizeThe adjustment angle range is 0 to 180°.
Perimeter working
Perimeter working
When enabled, the robot will work along the perimeter. When disabled, the robot will avoid working at the perimeter.
No-go zone perimeter mowing The robot will mow the no-go zone perimeters two circles when enabled.

Cutting path mode
Zigzag path The robot will mow in straight and single rows.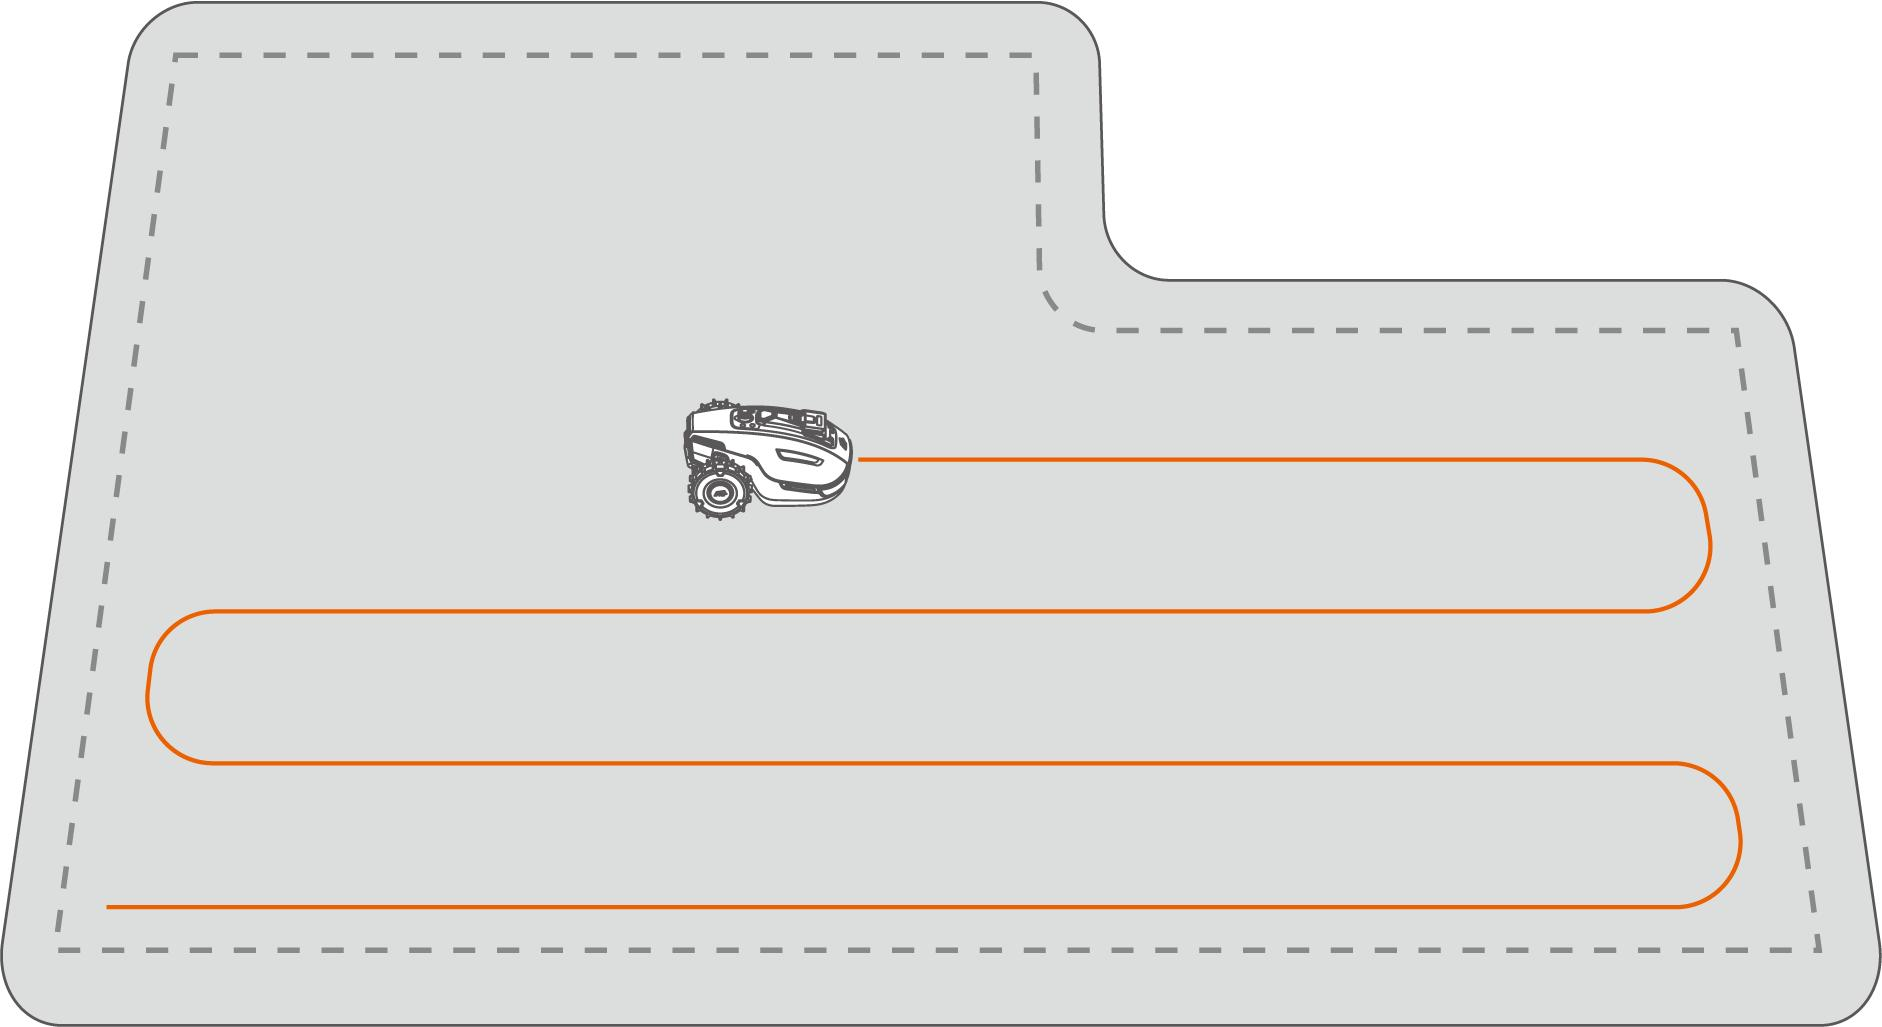 Chess board path The robot will work in straight rows both horizontally and vertically.
Obstacle avoidance
No-go zone perimeter mowing
The robot will mow the no-go zone perimeters two circles when enabled.
Cutting path mode
Zigzag path
The robot will mow in straight and single rows.
Chess board path
The robot will work in straight rows both horizontally and vertically.
Obstacle avoidance
>> OffThe robot will attempt to reach every spot of the selected areas. When encountering an obstacle, it will gently bump into it and then navigate around, ensuring a cleaner trim along walls and obstacles.>> Standard
The robot will proactively avoid obstacles to prevent collisions, which reduces damage and improves efficiency.
>> SensitiveThe robot will proactively avoid obstacles and non-grassy areas, reducing the risk of falling or leaving the lawn. However, some dried-out patches may be missed and could also block the returning path.
Task Schedule
With the Schedule function, you can set a regular task and the robot will automatically do its work according to your setting.
Set a Schedule
1. Tap Add on the Home page or tap Tasks on the Map page to enter the Task page.2. Select the area that you want to mow.3. Tap to configure the parameters.4. Tap Save to apply the settings.5. Tap Start to commence working, or tap Save to create a task schedule.
NOTE
The task schedule adding is temporarily disabled when the robot is working.
A schedule can be set after a task area has been created.
See Task Settings for detailed information on parameters.
NOTE
The task schedule adding is temporarily disabled when the robot is working.
A schedule can be set after a task area has been created.
See Task Settings for detailed information on parameters.
Edit a Schedule
Tap Tasks on the Map page to access the schedule list. Tap  on the schedule you set to open the drop-down menu.
>> Enable — toggle the buttonto off
to inactivate the schedule if needed.
>> Rename — tap to change the name of the schedule.>> Edit — tap to change the schedule.>> Run now — tap to run this schedule immediately.>> Copy — tap to create a new schedule with the same settings while keeping the original schedule, then choose one to edit.>> Delete — tap to delete the schedule.
If the exclamation mark  appears, it indicates that the task schedule cannot be performed due to errors. Tap the exclamation mark for more details.
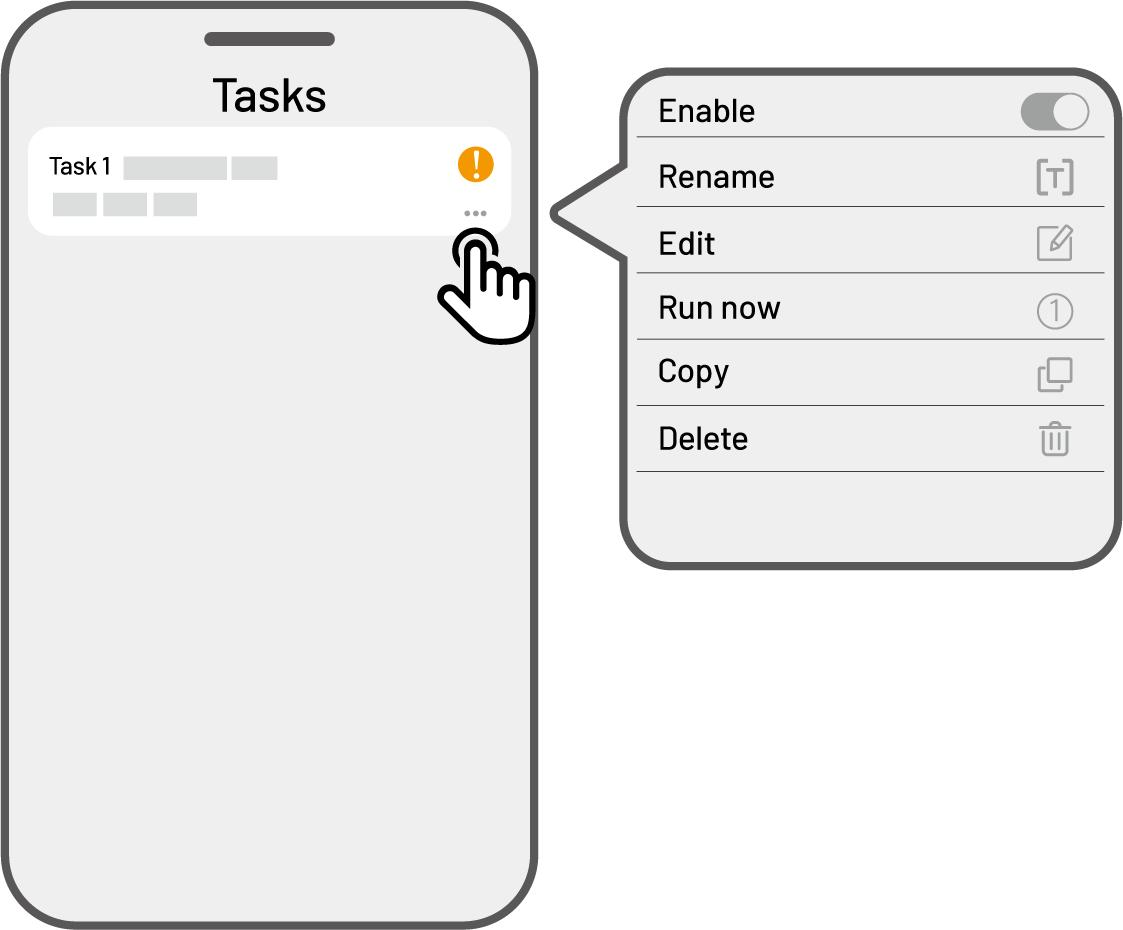
Related Articles
Task Settings
Frequency You can set the working frequency here. Now — The robot will commence work promptly upon configuration. Weekly — The robot will repeat the task every week based on your preferences. Cutting path angle (°) Optimal:Take the most efficient ...Map your Lawn and Create Task Area
Before Mapping-Preparation Before mapping, it is important to be aware of key considerations. Remove debris, piles of leaves, toys, wires, stones, and other obstacles from the lawn. Make sure no children or animals are on the lawn. Map Your Lawn 1. ...AI Vioce Control-To Link Your Alexa Account
NOTE ● Prior to starting a job using voice control, it is necessary to have created at least one task beforehand. ● In cases where more than 2 sets of robot are linked to the same Mammotion account, the voice command will be directed to the most ...AI Vioce Control-To Link Your Google Home Account
NOTE Prior to starting a job using voice control, it is necessary to have created at least one task beforehand. The robot now supports voice commands in English, German, and French. 1. Go to the Me page and tap on Google Home. 2. Tap Link Google Home ...How to Create Pattern
The pattern is designed to personalize your lawn-cutting experience, and after it's added, the grass on the patterned area will be preserved while cutting to maintain its design. See the available patterns in the app. 1. Tap Create > Pattern on the ...